|
||||||||||||||
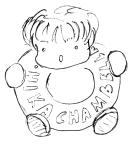
| Hika-chambella |
|---|
A special thank goes to the webmistress of
** TFS ** The Fire Soul,
whose is the subject
of this super deformed sketch. Over the blue doughnut that I've used for the
body is written "Hika-chambella", "Hika" is a short form for her nick Hikaru
and "chambella" is a manipulation of the suffix -chan (used in Japan for
calling friends) in order to make it sound like "ciambella" (the Italian word
for doughnut). Of course she is really greedy, mainly for chocolate!
;P
|
|
Step
00 |
|
From now the sketch layer will stay forever over the others. |
||||||||||||||||
|
Step
01 |

|
Create a new layer and call it "Details". In this example I've used it for painting the blue doughnut. As you can see, thanks to the multiply mode, the black lines of the sketch are kept while the white zones are "transparent". Don't be too afraid of going outside the shapes, in the next steps we will see that some stuff will "disappear", covered by other layers. |
||||||||||||||||
|
Step
02 |

|
For first you should fill with the base colour the shapes (use a paint tool), then apply (with the airbrush) darker shades on the edges and brighter ones over the cheeks. |
||||||||||||||||
|
Step
03 |

|
|
||||||||||||||||
|
Step
04 |

|
;P
Please notice only that this layer is below the sketch one but over the others, so the extra painted zones of the "Skin" layer are covered by this one. I.e. you can add some shadows over the forehead by painting over these zones. |
||||||||||||||||
|
Step
05 |

|
;)
|
| TSS |
|
Layout & Graphics are © Marco (LM) Lamberto
- lm(@)sunnyspot(.)org
Made with GIMP & WPP, The Web PreProcessor http://the.sunnyspot.org/slm/tutorials/01.html - Revised: 2021/01/02 16:48:52 |
|